
[This is part of my ARCHWAY-101 series.]
Unroll and Relax
Your Flex Trim will arrive all rolled up in cardboard boxes. Before you work with it you’ll need to bring it into the house, unroll it and let it relax into shape.
Straight Pieces
This Flex Trim order was the first time I used straight pieces in a design. I opened the boxes and took an inventory of my order. No straight pieces. I thought they forgot to ship my straight pieces.
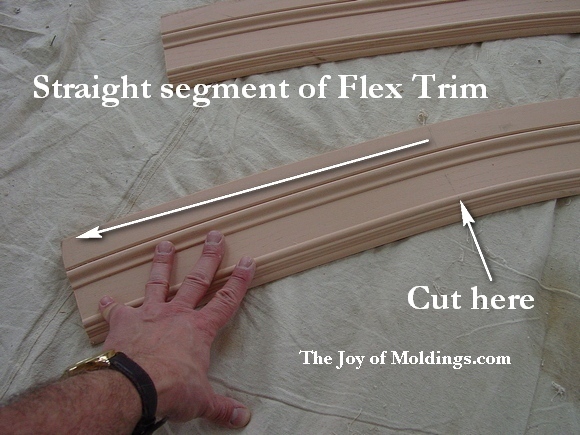
But after a frantic call to Flex Trim, they assured me the straight pieces were included at the ends of the radius pieces of the same profile.
Sure enough, they were right there.
Whew! And here I thought my project was going to be delayed by a month.
Cutting Flex Trim
Flex Trim is very rubbery. And being very rubbery it leaves a very rubbery mess when you cut in on your miter saw.
Don’t leave these Flex Trim shavings lying around because they tend to kind of glue themselves together and stick to things. Like the nooks and crannies of your miter saw. So just vacuum it all up when you’re done with your cuts.
And yes, it cuts just fine on a miter saw.
Above I cut my straight pieces from the radius piece so I could play with the molding in place.
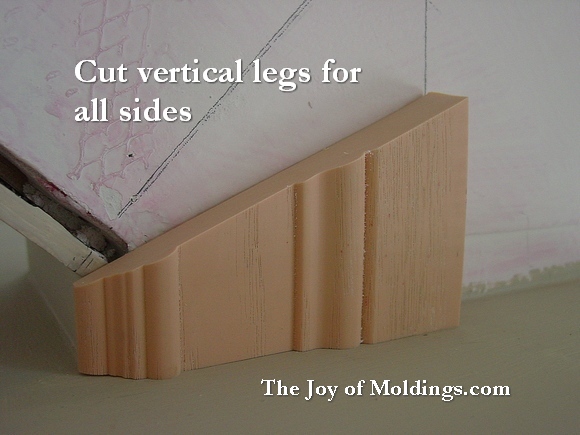
This is also where you’ll decide to make your miter cut which determines the leg height.

Below Give yourself at least 1/8″ reveal between the inner edge and the arch soffit, but not much more than that, you don’t want a bulky reveal.

Below Here I liked the inner height of the leg but the angle was way off.

Below After playing around with a few other angles, the answer became obvious, 22.5 degrees.

Below With my angle known, I cut all the pieces for both sides of the arch.
Below Flex Trim recommends a heavy-duty construction adhesive on all contact surfaces. I also shot 18 gauge brad nails into it.

Filling Nail Holes in Flex Trim
After shooting a brad nail into the material, the Flex Trim tends to close in around the hole — it being flexible and all.
So I waited a full day for the material to settle before using my normal brand of spackling to fill the nail holes.
How to Build ARCHWAY-101 Series
1. How to Build ARCHWAY-101 Part 1: Gallery
2. How to Build ARCHWAY-101 Part 2: Materials Inventory
3. How to Build ARCHWAY-101 Part 3: How to Make the Pilaster Core
4. How to Build ARCHWAY-101 Part 4: Keystone Materials and Layout
5. How to Build ARCHWAY-101 Part 5: Installing the Flex Trim Legs
6. How to Build ARCHWAY-101 Part 6: Installing the Arched Casing
7. How to Build ARCHWAY-101 Part 7: Flex Trim Backband & Keystone